How to create your Portfolio website?
A website of your own increases credibility. It gives the freedom, design-wise and content-wise that no other service can give. By no other service, I mean services like Behance, dribble etc. If you are a spoilt child, you can go to all in one places like google domains or Godaddy, buy a domain and host a website right there.
List of places you get an all in one package for building portfolio:
1. Adobe Portfolio
2. Squarespace
3. Wix
4. GoDaddy
5. Cargo
But if you want to have control over what you do, you might want to decentralise the parts of your website and not let a company have control over you. We either code from scratch or use WordPress.
WordPress is a powerful free and open-source content management system written in PHP and paired with a MySQL or MariaDB database. Features include a plugin architecture and a template system, referred to within WordPress as Themes.
To do that you need a basic understanding of how a website works. Just bear with me for the next few steps. or you can skip to ‘Buying a domain name‘ if theory bores you.
Step 0: Theory
Each website has an address. For eg., google’s web address is ‘google.com’. This web address is called the ‘domain name’.
You use this domain name to reach the location where you host your website. This location or address is also known as the ‘DNS address’. The DNS address of a domain name is stored in the Registrar. (address books of the web).
DNS address points to the location where the website data is stored. This place where the website is stored is called the Webhost/Server.
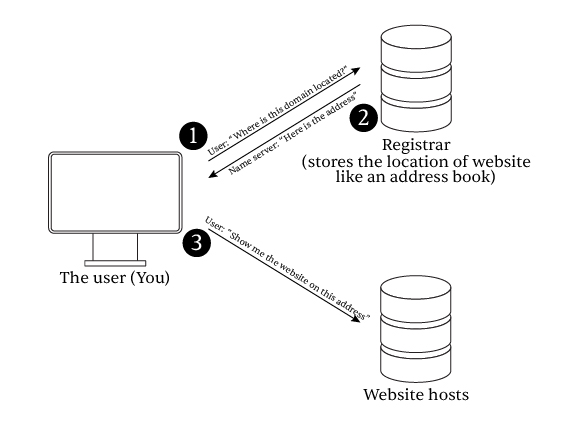
So basically, when you type a domain name in the address bar/search bar, this happens.
User asks registrar
when you type, a domain name in the address bar/search bar (e.g. netflix.com), the browser asks the name server for the DNS address.
NS replies with an address
The name server looks up the DNS address of the domain name in its address book. Then it replies with the location of the website.
Receive website using the DNS address
Using the DNS address, your browser asks the server to show the data for the website.
So… Why should we know about this? Good thing you asked. We need to buy a Domain name to tell the registrar “We want to call our DNS address using this fancy name”. And whenever you type in that fancyname.com, your website hosted somewhere else comes up!
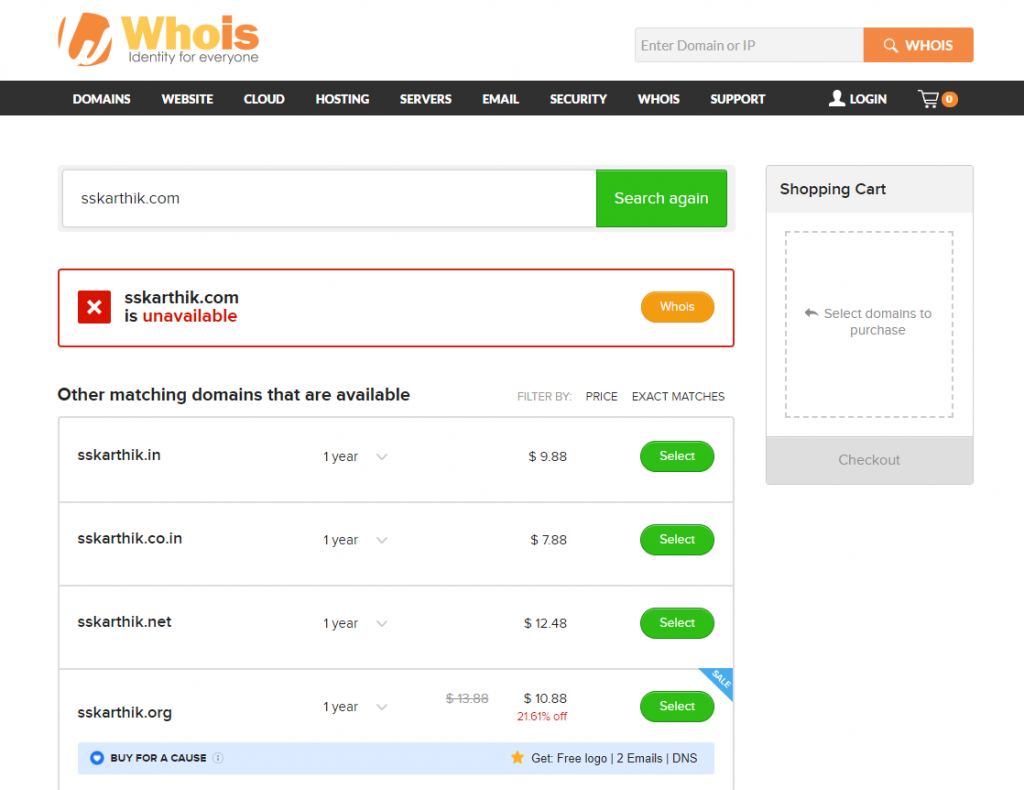
Step1: Buying a domain name
The first step is to get a name for your website. This takes a lot of time. You can use whois.com or any other whois service to see if a domain name is available. Choose your name wisely.
After finding your perfect name, you can go buy your domain from a good registrar. My personal favourite: is Dynadot.com.
(Mostly because domains are the cheapest here and hassle-free experience, good UI and also secure)
You can choose from other registrars here.
Namesilo.com | Namecheap.com | Domains.google | Or any other costlier ones.
An article on choosing the best registrar by Cloudflare.
In my opinion, you need to look for 2 things while buying a registrar’s name.
Recurring cost
Check for the cost of your domain for the second or third year. Because some registrars sell a domain for very cheap (around $2 for .com domain) and increase its price multifold once your domain name gains traction.
Data Protection
Make sure your registrar gives you privacy protection from whois searches. If you are going to leave your email address and home address sitting public, trust me, it’s bad news.
Alternatively, you can transfer your domain to a very secure registrar like Cloudflare which is free for basic use and won’t charge you for renewal. They also give you free hassle-free SSL! (I’ll explain this later in this post)
You can also route through Cloudflare without using it. (Later)
Step 2: Choosing a web-host
This is where you actually find the space to host your website. There are a lot of paid hosts who are very reliable. But, if you are just starting, you can go with free hosting. But I consider only 3 locations worth even trying because free hosting mostly sucks.
I’ll mention the hosting sites that (don’t suck) I like.
FreeHosting.com | infinityfree.net (or Byet) | x10hosting (My favourite) | I’m absolutely sure that the rest of the free hosting services suck based on months of testing and figuring out stuff.
There are a lot of downsides to free hosting, You can’t get a mail server, limited resources, unsupported SSL etc.
Even though free hosts work fine, customer care is very important for web hosting. I’d suggest buying cheap hosting like MilesWeb. Or if you are from NID, you can connect with me, I can lend you some space on my hosting for you to try out.
This part is Important: After creating your hosting account, you’ll receive your name servers. Copy it and go to your Domain name provider (step1).
Add your nameservers in the DNS tab and save them.
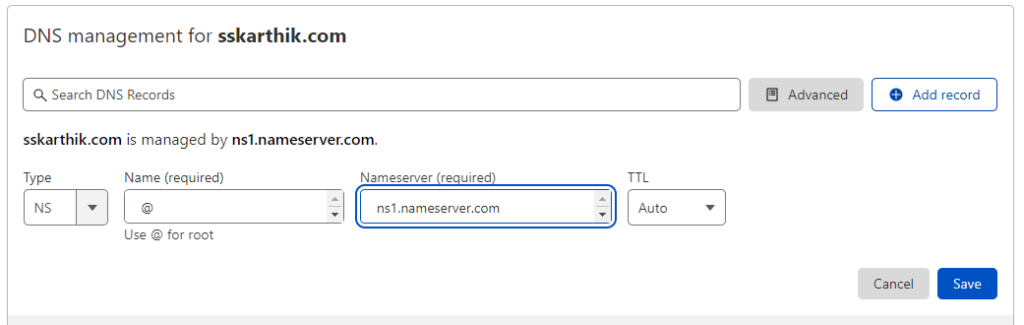
This will link your domain name (eg. www.sskarthik.com) to the website hosting provider which lets to visit your website by typing the name in the search bar.
Step 3: Design
It’s important that you design your website before even publishing it on the website mainly for 2 reasons:
1. Building / Designing a website offline is way faster. You can skip all the waiting times for loading from the server.
2. You can save money on hosting till you are done with the website.
But installing WordPress in web hosting is quick and hassle-free.
(To install WordPress offline on a PC skip here.)
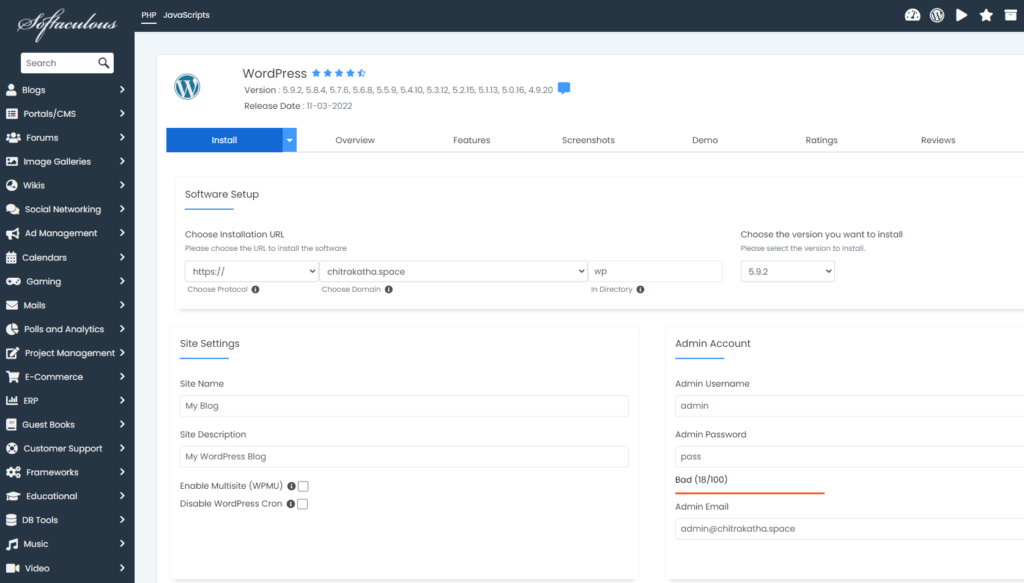
Installing WordPress Online
1. Open your web control panel
2. Look for softaculous app installer and click wordpress

3. Give your username and password, click on install and it will be done in seconds.
Installing WordPress offline
(You can find many tutorials on how to do this. Just search google if the upcoming steps seem confusing)
Step 1: Installing a local server like XAMPP (on a PC) or MAMP (on a Mac) helps you work as if the website is on the internet.
2: Go to wordpress.org and download the latest build of WordPress.
3: Go to the htdocs folder (where you installed the MAMP on your PC), extract the wordpress.zip to a new folder (eg. mysite)
4: After you’ve installed MAMP or XAMPP, run ‘Apache’ & ‘MySQL’. Apache helps in hosting the WordPress website and MySQL takes care of the website’s database.
Note: you need to start XAMPP-Apache&MySQL(Win) or MAMP(Mac) every time you want to make your website live on your PC.
5. Click on ‘admin’ of MySQL – it should take you to the start page. Now click on phpMyAdmin. In the phpMyAdmin page, create a new database (eg. wordpress).

6. Navigate to your WordPress folder (eg. HTTP://localhost/mysite) and it will guide you through your setting up process.
NOTE: If you have trouble/get an error while linking your database to your WordPress, try changing the PHP version to anything lower than 8.
Designing on WordPress
On entry, you’ll get a dashboard and an actual website.
The dashboard looks something like this and can be reached by navigating to your website location and adding ‘wp-admin’ at the end. (eg. https://localhost/mysite/wp-admin)
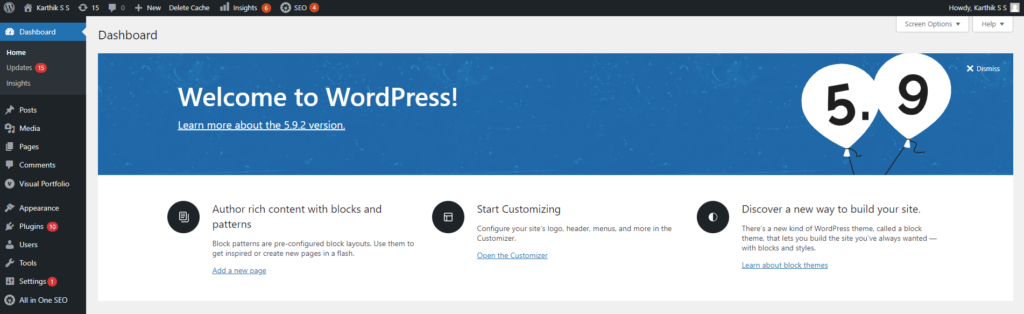
This is the backend of your WordPress website.
On the left you get
1. ‘Posts’ – for managing Blog posts
2. ‘Pages’ – for managing individual web pages and
3. ‘Plugins’ – for managing different plugins for the website.
Plugins are like apps you install on your phone for various tasks. We will use a plugin called Visual Portfolio to put in our portfolio work.
For a good website, it is good to have a Landing Page. You can also add a contact page, blog page and Portfolio page to make it more professional. You can add and manage them using the ‘Pages’ section on the admin panel.
There is one more tab called ‘Appearance’ on the left which is used to customize your website’s header, footer, colours, typography etc. You can also change the theme of the website here.
Some very good free WordPress themes you can try:
1. Blocksy – https://wordpress.org/themes/blocksy/
2. Astra – https://wordpress.org/themes/astra/
3. OceanWP – https://wordpress.org/themes/oceanwp/
To take your designs to next level, you can also try the Elementor Plugin. You can find 100s of tutorials on how to build an Elementor webpage online. The above themes work nicely with WordPress. but you can also try the ‘Hello Elementor’ (https://wordpress.org/themes/hello-elementor/) theme.
Plugins mentioned earlier:
1. Elementor
2. Visual Portfolio
Other nice plugins you can try:
1. All in one SEO (https://wordpress.org/plugins/all-in-one-seo-pack/)
2. Monster Insights (https://wordpress.org/plugins/google-analytics-for-wordpress/)
3. WP Super Cache (https://wordpress.org/plugins/wp-super-cache/)
4. WebP Converter for Media (https://wordpress.org/plugins/webp-converter-for-media/)
5. ElementsKit Elementor Header & Footer (https://wordpress.org/plugins/elementskit-lite/)
6. Essential Addons for Elementor (https://wordpress.org/plugins/essential-addons-for-elementor-lite/)
7. Really Simple SSL (https://wordpress.org/plugins/really-simple-ssl/)
Step 4: Launching
If you are designing the website offline, it’s time to move it to your website host. If you are designing it online, your website is already up and running. You can visit your website by going to the domain you bought in the first step.
1. Activate your hosting
1. Get the nameservers to link from your hosting provider. (Ideally, the hosting company will provide 2 nameservers)
2. Link your Domain name to your hosting. (See here)
2. Move your files
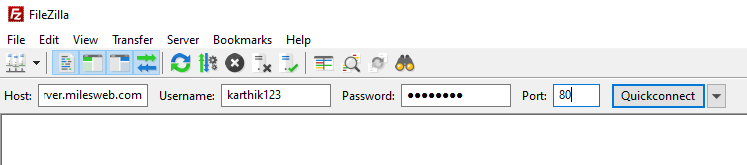
1. We use ‘FileZilla’ to connect with the server’s disk space.
FileZilla: https://filezilla-project.org/download.php?show_all=1
2. get the host(usually the same link as your control panel), username and password for FTP from your hosting provider (you can also find them in the FTP section of the control panel)
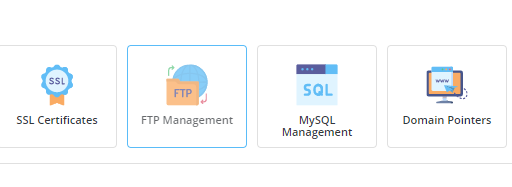
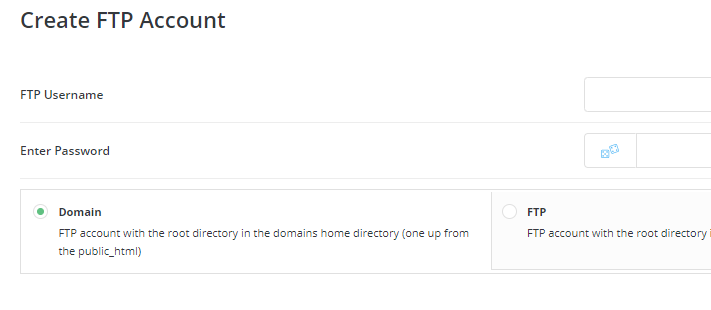
You can also create an FTP account from the Control Panel:

Note: create with FTP path to the Domain:
3. Enter the login details in FileZilla and quick connect.
4. Copy all the files in ‘my site’ folder on PC to the ‘public_html’ folder on the server.
3. Copy the Database
You can either ask your hosting provider customer care to help you with this.
OR
On your PC:
- Log into your current hosting account
- Open the phpMyAdmin app (stored under ‘Databases’ in your account control panel)
- Click on the correct database for your website from the list on the left-hand side. If you only have one website, you’ll only see one database
- Select the Export tab
- Click the Go button
- Find the SQL file you’ve downloaded and move it to the same folder as your website files to keep everything in one place
On your Hosting Control Panel
- Log in to your new hosting account
- Open the MySQL Databases section (stored under ‘Databases’ in your account control panel)
- Under the heading Create New Database, fill in the chosen name of your new database (put this in the field labelled New Database:)
- Click the Create Database button
You’ll then be prompted to create a username and password. Make note of these, and grant the user full privileges when prompted.
In this next step, we’re taking the downloaded database file and adding it to the new database we just created in our new hosting account.
- In your new hosting account, navigate back to the Database section
- Select the phpMyAdmin app
- Click the + button under your username on the left-hand side to see all your databases (including the one you just created)
- Select the new database from this list. The message ‘No tables found in database’ will appear (this is what we want!)
- Go to the Import tab in the top menu
- Click the Choose File button, and select the SQL file you saved earlier. The name of this file should then appear next to the button
- Leave all other fields on this page unchanged, and click the Go button at the bottom when you’re done
- Your database is now being imported – you’ll see a loading wheel until this is completed, at which point you’ll see a new screen with ‘Import has been successfully finished’ across the top.
Final Step (Final Fix to make your site work)
Once all your files are up on the new server, you’ll need to access your WordPress root folder one more time. If you try to actually visit your website now, it won’t work, because you need to update WordPress’ wp-config php file so that it points towards your new database.
To do this, locate the wp-config PHP file within your html_public folder, right-click on it, and select the View/Edit option:
This will open the file using your local text editor, enabling you to make changes. Here are the three lines you’ll need to update:
define('DB_NAME, 'db_name');
define('DB_USER, 'db_user');
define('DB_PASSWORD, 'db_pass');
Currently, all three lines will include values that point towards your old database. Go ahead and replace the lowercase variables with the credentials for your new database, which you created during the previous step.
Then, save the changes to the file and close it. You should now be able to access your WordPress website, which will look just as it did before.
Step5: Hooray!
The website is up and running. You can visit it by typing the domain name on the search bar. eg. www.sskarthik.com.
You can go to the admin panel by visiting HTTP://your-domain-name/wp-admin. eg. sskarthik.com/wp-admin.
You can test the website for any errors once and share the domain names with friends, family and other companies and enjoy.